The air in a high-performance kitchen does not just sit; it vibrates with the kinetic energy of boiling water and the structural tension of unleavened dough. We are not merely making dinner; we are engineering a masterclass in starch gelatinization and structural integrity. Enter the Boiled Pierogi. This is the gold standard of Eastern European comfort, a delicate parcel of dough that must withstand the turbulent, high-heat environment of a rolling boil without catastrophic structural failure. When executed with precision, the result is a silky, almost translucent exterior that yields to a rich, savory interior. It is a game of millimeters and seconds. If your dough is too thick, you are serving leaden weights; if it is too thin, the filling escapes into the abyss of the pot. We are looking for that perfect, pillowy resistance that signals a successful hydration of the flour proteins. Prepare your station, calibrate your senses, and let us dive into the visceral reality of the perfect boil.
THE DATA MATRIX
| Metric | Specification |
|---|---|
| Prep Time | 60 Minutes |
| Execution Time | 15 Minutes |
| Yield | 36-40 Parcels |
| Complexity (1-10) | 7 |
| Estimated Cost per Serving | $1.45 |
THE GATHERS
Ingredient Protocol:
- 500g / 4 cups All-Purpose Flour (High protein preferred)
- 250ml / 1 cup Warm Water (50 degrees Celsius)
- 1 Large Egg / 50g (Room temperature)
- 30g / 2 tbsp Unsalted Butter (Melted)
- 5g / 1 tsp Fine Sea Salt
- 500g / 2 cups Mashed Potatoes (Starchy Russet variety)
- 200g / 1.5 cups Farmer's Cheese or Quark
- 100g / 1 medium Yellow Onion (Finely minced)
- 5g / 1 tsp Freshly Cracked Black Pepper
Section A: Ingredient Quality Audit:
The most common failure point in the Boiled Pierogi lifecycle is the moisture content of the filling. If your mashed potatoes are too viscous or watery, they will steam inside the dough, causing it to bloat and rupture. To fix this, always render the moisture out of your potatoes by returning them to the hot pot after draining but before mashing. If your flour has a low protein count, the dough will lack the tensile strength to hold its shape. You can troubleshoot this by adding a pinch of vital wheat gluten or ensuring you do not over-work the dough, which would cause excessive elasticity that snaps back during the rolling phase. Finally, ensure your cheese is dry; if using a wet curd, press it through a fine-mesh sieve to remove excess whey.
THE MASTERCLASS
1. The Dough Synthesis
Combine your flour and salt on a clean work surface or in a large stainless steel bowl. Create a well in the center and introduce the warm water, melted butter, and egg. Use a bench scraper to fold the flour into the liquid, gradually incorporating the dry mass until a shaggy ball forms. Knead for approximately 8 minutes until the surface is supple and smooth.
Pro Tip: Using warm water instead of cold allows the starch granules to begin swelling immediately, which improves the pliability of the dough. A digital scale is non-negotiable here; volumetric measurements are the enemy of consistency in gluten development.
2. The Hydration Rest
Wrap the dough tightly in plastic film and let it rest at room temperature for at least 30 minutes. This is not a suggestion; it is a biochemical requirement. During this time, the gluten network relaxes, and the moisture redistributes evenly throughout the flour particles.
Pro Tip: If you skip the rest, the dough will be "bouncy" and difficult to roll out thin enough. A relaxed dough allows you to achieve that professional, delicate thickness without tearing.
3. Filling Calibration
While the dough rests, sauté your minced onions in butter until they are translucent and slightly caramelized. Fold these into your dry mashed potatoes and cheese. Season aggressively with salt and pepper. The filling must be flavorful enough to punch through the neutral dough exterior.
Pro Tip: Use a saucier for the onions to ensure even heat distribution. The rounded bottom of the pan prevents the onions from catching in the corners and burning, which would introduce a bitter note to your filling.
4. Precision Rolling and Cutting
Divide your dough into four manageable sections. On a lightly floured surface, roll the dough out until it is approximately 2mm thick. Use a circular cutter or a glass with a sharp rim to stamp out circles of dough. Keep the remaining dough covered to prevent desiccation.
Pro Tip: A heavy rolling pin provides the necessary leverage to achieve a uniform thickness. Consistency in thickness ensures that every pierogi in the batch reaches the ideal "al dente" state at the exact same time.
5. The Structural Seal
Place a rounded teaspoon of filling in the center of each circle. Fold the dough over and pinch the edges firmly to create a crescent shape. Ensure there are no air pockets trapped inside, as air expands when heated and can cause the pierogi to explode during the boil.
Pro Tip: If the dough feels dry, lightly trace the edge with a damp finger. However, do not over-saturate the edge; too much water creates a slippery interface that will not bond during the cooking process.
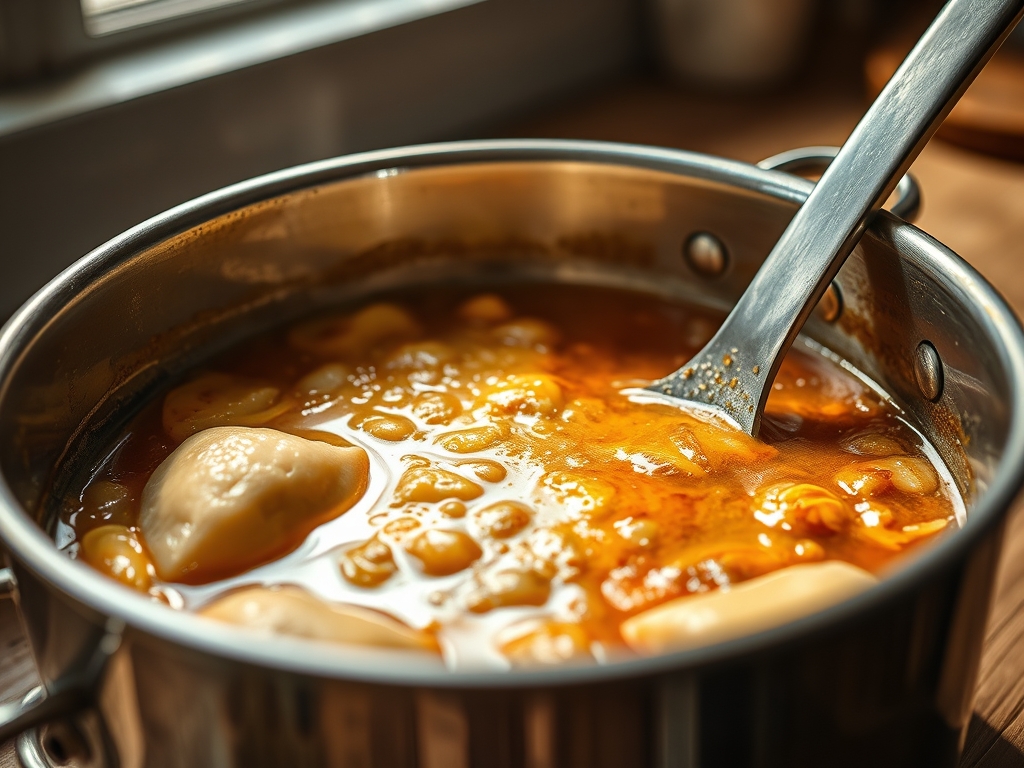
6. The Kinetic Boil
Bring a large pot of salted water to a rolling boil. Drop the pierogi in batches, ensuring they have enough space to move freely. Once they float to the surface, allow them to cook for an additional 2 to 3 minutes.
Pro Tip: The "float" is a visual cue that the density of the pierogi has changed as the internal air and moisture expand. Use a slotted spoon or a spider strainer to remove them gently, preventing mechanical damage to the delicate skins.
Section B: Prep & Timing Fault-Lines:
The most dangerous timing error occurs between the sealing and the boiling. If you leave raw pierogi on a tray for too long, the moisture from the filling will migrate into the dough, making the bottom soggy and prone to sticking. To mitigate this, place the formed pierogi on a tray lined with parchment paper and a light dusting of semolina flour. If you find the water is taking too long to return to a boil after adding the dough, you are overcrowding the pot. This drops the temperature too significantly, leading to a gummy texture rather than a clean, firm bite.
THE VISUAL SPECTRUM
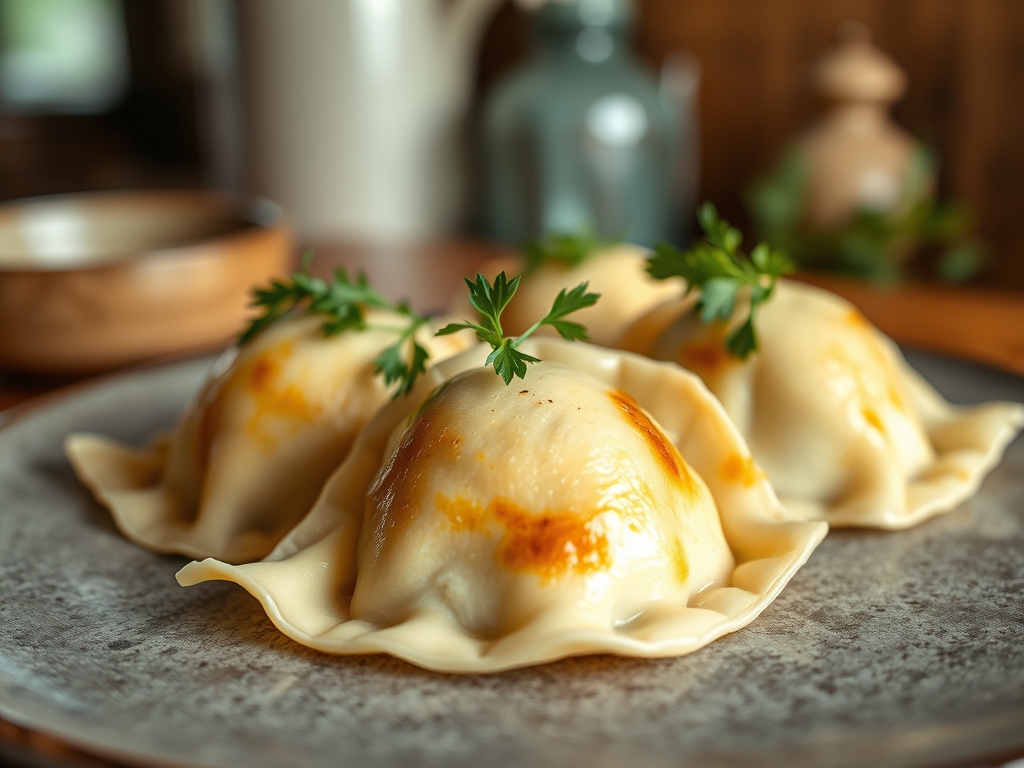
Section C: Thermal & Visual Troubleshooting:
Referencing the Masterclass photo, the ideal Boiled Pierogi should exhibit a matte, pearlescent finish with no visible dry flour spots. If your pierogi appear "shaggy" or have rough edges, the dough was likely too dry during the rolling phase. If the edges are translucent while the center remains opaque, you have uneven thickness issues. Uneven browning is only a concern if you choose to pan-fry them post-boil; for a pure boiled application, we are looking for a uniform, pale ivory color. If the filling is visible through the dough, it is a sign of superior rolling technique, provided the structural integrity remains intact.
THE DEEP DIVE
Macro Nutrition Profile
A standard serving of four pierogi provides approximately 320 calories, with 45g of carbohydrates, 10g of protein, and 12g of fat. The primary energy source is complex carbohydrates from the flour and potatoes, making this a high-octane fuel source.
Dietary Swaps
- Vegan: Replace the egg with 15ml of neutral oil and use a vegan butter substitute. For the filling, swap the cheese for a cashew-based cream or seasoned sauerkraut.
- Gluten-Free: Use a high-quality 1-to-1 gluten-free flour blend containing xanthan gum to provide the necessary elasticity.
- Keto: This is a high-carb dish by nature; however, "fathead" dough (mozzarella and almond flour) can be used, though the boiling stability is significantly lower than traditional dough.
Meal Prep & Reheating Science
To store, toss boiled pierogi in a small amount of neutral oil to prevent sticking and refrigerate in a single layer. To reheat while maintaining molecular structure, avoid the microwave, which can turn the dough rubbery. Instead, steam them for 3 minutes or quickly sear them in a pan with butter to infuse the exterior with a crisp texture.
THE KITCHEN TABLE
Why do my pierogi fall apart as soon as they hit the water?
This is usually due to a weak seal or trapped air. Ensure the edges are firmly crimped and free of flour or filling debris. Air pockets expand rapidly in boiling water, creating internal pressure that ruptures the dough.
Can I freeze them before boiling?
Absolutely. Freeze them in a single layer on a tray before transferring to a bag. Do not thaw before cooking; drop them directly into boiling water and add 2 minutes to the cook time after they float.
What is the best flour for the job?
Look for a flour with a protein content between 10% and 11.5%. This provides enough gluten for strength but keeps the dough tender. Bread flour is too tough; cake flour is too weak.
How much salt should be in the boiling water?
The water should taste like a seasoned soup. Salt seasons the dough from the outside in and helps to tighten the gluten structure during the rapid cook.
My dough is too springy and keeps shrinking back. Help!
Your gluten is over-activated. Cover the dough and let it rest for another 15 minutes. This allows the protein bonds to relax, making the dough much more cooperative under the rolling pin.