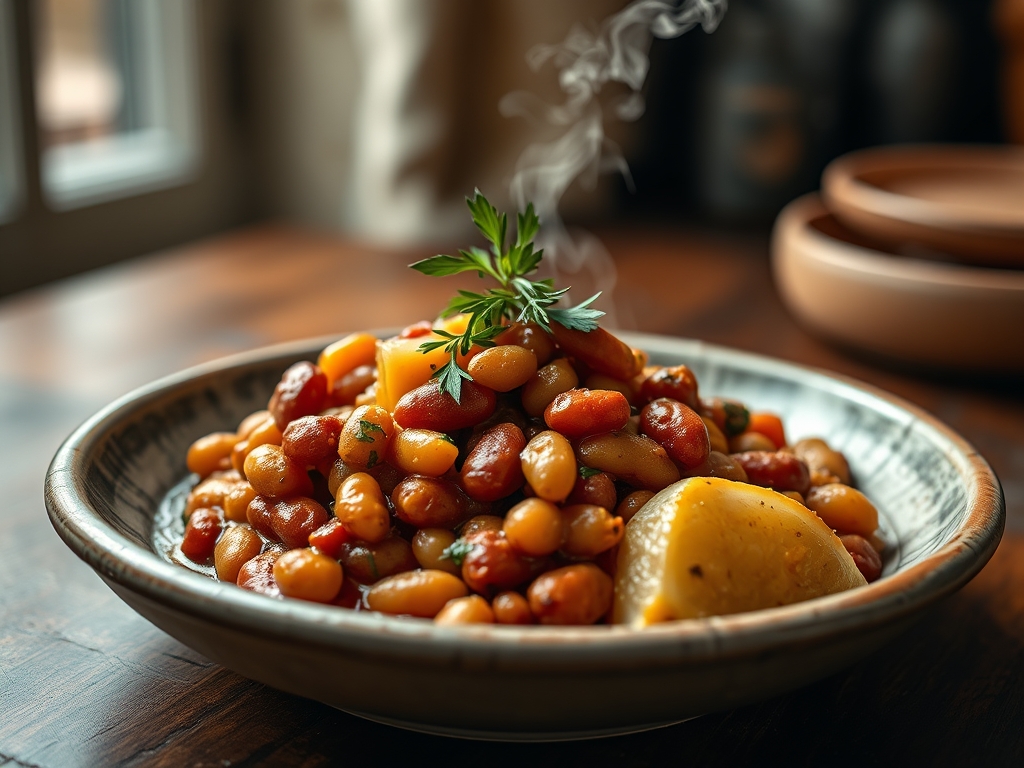
Forget everything you know about the humble, dusty legume sitting in the back of your pantry. We are not just making dinner; we are engineering a masterpiece of starchy suspension and lipid integration. The Pinto Bean Boil is the ultimate test of a cook's ability to manage cellular breakdown while maintaining structural integrity. When executed with precision, the result is a pot of beans where the broth has transformed into a viscous, velvet liquor that coats the back of a spoon with the authority of a French mother sauce. We are looking for that specific moment where the bean skins reach their breaking point but refuse to shatter, releasing just enough internal starch to emulsify with the rendered fats. The aroma should be a piquant cloud of earthy cumin and smoky pork, signaling a successful infusion of aromatics into the very heart of the seed. This is high-stakes infrastructure for your palate. If you crave a texture that blurs the line between solid and liquid, you have come to the right place.
THE DATA MATRIX
| Metric | Specification |
|---|---|
| Prep Time | 20 Minutes (plus 8-12 hour soak) |
| Execution Time | 2.5 to 3 Hours |
| Yield | 6 to 8 Servings |
| Complexity (1-10) | 4 (Technical patience required) |
| Estimated Cost per Serving | $0.85 USD |
THE GATHERS
Ingredient Protocol:
- 450g / 1 lb Dry Pinto Beans (Sorted and rinsed)
- 1.9L / 8 cups Filtered Water or Low-Sodium Chicken Stock
- 150g / 5 oz Thick-cut Smoked Bacon or Salt Pork (Diced)
- 1 Large Yellow Onion (Small dice)
- 4 Cloves Garlic (Smashed and minced)
- 15g / 1 tbsp Kosher Salt (Adjust to taste)
- 5g / 1 tsp Ground Cumin
- 2g / 0.5 tsp Smoked Paprika
- 1 Bay Leaf
- 5ml / 1 tsp Apple Cider Vinegar (Added at the finish)
Section A: Ingredient Quality Audit:
The most common failure point in a Pinto Bean Boil is the age of the legume. Old beans are biologically stubborn; they contain hardened hemicellulose that refuses to soften regardless of how long you apply heat. If your beans remain "toothy" after three hours, your raw material was likely sitting on a grocery shelf since the previous decade. To fix this mid-boil, add 1/4 teaspoon of baking soda to the water. This increases the pH level, which helps break down the pectin in the cell walls. Furthermore, always use filtered water if you live in a hard-water area. The calcium and magnesium in hard water bind to the bean skins and prevent them from softening, leading to a grainy, disappointing texture.
THE MASTERCLASS
1. The Hydration Phase
Place your sorted beans in a large bowl and cover with water by at least four inches. Allow them to hydrate for a minimum of eight hours. This is not just about softening; it is about leaching out complex sugars that cause digestive distress. Use a digital scale to ensure your bean-to-water ratio is consistent for future batches.
Pro Tip: Adding a tablespoon of salt to the soaking water (a brine) helps the sodium ions replace some of the magnesium and calcium in the skins. This results in a much creamier interior once the cooking begins.
2. Rendering the Lipid Base
In a heavy-bottomed saucier or Dutch oven, add your diced bacon over medium-low heat. You want to slowly render the fat until the proteins are crisp and the bottom of the pot is coated in a golden liquid. Use a bench scraper to transfer your onions and garlic into the pot once the fat is liquid.
Pro Tip: This step creates the Maillard reaction products that provide the foundational "umami" for the entire dish. Do not rush this; the goal is a translucent onion that has fully absorbed the pork fat.
3. The Primary Infusion
Drain your soaked beans and add them to the pot along with your cumin, paprika, and bay leaf. Stir for two minutes to "toast" the beans in the fat. This helps infuse the spices directly into the outer layer of the bean before the liquid is added. Pour in your 1.9L of water or stock.
Pro Tip: Toasting the dry spices in fat (blooming) releases fat-soluble flavor compounds that water alone cannot extract. This ensures the flavor is layered through the entire molecular structure of the broth.
4. Managing the Pinto Bean Boil
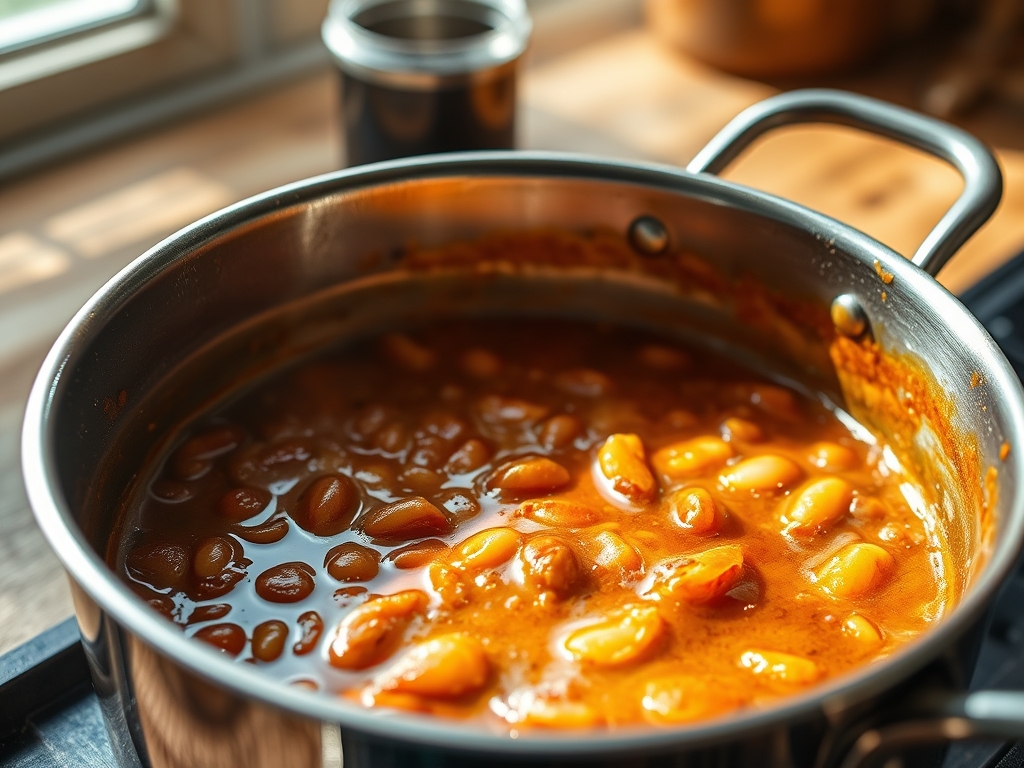
Bring the liquid to a rolling boil for ten minutes, then immediately reduce to a very low simmer. The surface should only show occasional bubbles. Cover the pot with a tight-fitting lid but leave a tiny crack for steam to escape. This prevents the beans from agitatedly smashing against each other and turning into mush.
Pro Tip: Use an infrared thermometer to check that your liquid stays between 185 and 200 degrees Fahrenheit. Maintaining this thermal window ensures the starch granules swell and gelatinize without the seed coat rupturing prematurely.
5. The Emulsification Finish
Once the beans are tender (usually at the 2.5-hour mark), remove the lid. Take a heavy spoon and mash about 10 percent of the beans against the side of the pot. Stir vigorously to aerate and incorporate the released starches into the cooking liquid. Add your apple cider vinegar and final salt adjustment now.
Pro Tip: The vinegar provides a piquant counterpoint to the heavy fats and starches. Adding acid too early in the process would toughen the beans, so always reserve it for the final five minutes of the build.
Section B: Prep & Timing Fault-Lines:
The biggest human error is the "boil and forget" mentality. If your heat is too high, the exterior of the bean will disintegrate into a grainy silt while the interior remains chalky. If you find your liquid level dropping too fast, replenish it with boiling water, not cold water. Adding cold water shocks the beans and can cause the skins to "blow out," destroying the aesthetic of the Pinto Bean Boil. Use a timer to check the pot every 30 minutes to ensure the simmer is gentle.
THE VISUAL SPECTRUM
Section C: Thermal & Visual Troubleshooting:
Referencing the Masterclass photo, your final product should exhibit a deep, russet-brown hue with a glossy sheen. If your beans look dull or grey, you likely skipped the spice-toasting phase or used old, oxidized spices. If the liquid looks thin and watery like a tea rather than a gravy, you have not mashed enough beans to release the necessary starches for emulsification. Conversely, if the pot looks like a thick paste, your evaporation rate was too high; whisk in a small amount of warm stock to loosen the suspension. The ideal visual cue is a "halo" of rich, orange-tinted oil shimmering on the surface of a thick, mahogany broth.
THE DEEP DIVE
Macro Nutrition Profile:
Pinto beans are a nutritional powerhouse, offering approximately 15g of protein and 15g of fiber per cooked cup. They are high in folate, magnesium, and iron. When paired with the healthy fats from the rendering process, they provide a slow-release energy source with a low glycemic index.
Dietary Swaps:
- Vegan: Replace bacon with 30ml of smoked olive oil and add a teaspoon of liquid smoke or smoked sea salt to mimic the depth of the pork.
- Keto: While beans are naturally high in carbs, you can reduce the portion size and increase the ratio of fats (extra bacon and avocado toppings) to fit specific macronutrient targets.
- GF: This recipe is naturally gluten-free, provided your chicken stock is certified.
Meal Prep & Reheating Science:
Beans are better the second day because of starch retrogradation. As the beans cool, the starch molecules realign into a more crystalline structure, which thickens the sauce even further. When reheating, do not use a microwave; it creates "hot spots" that can explode the beans. Instead, use a small saucepan over low heat and add a splash of water to re-hydrate the emulsion.
THE KITCHEN TABLE
Why are my beans still hard after hours of boiling?
This is usually caused by old beans or hard water. The minerals in hard water strengthen the bean's cell walls, making them nearly indestructible. Use filtered water and a pinch of baking soda to fix the pH balance.
Can I skip the soaking process?
You can, but it will double your cook time and increase the likelihood of uneven textures. Soaking ensures the bean hydrates from the center out, leading to a much creamier "melt in your mouth" consistency.
What is the best pot for a Pinto Bean Boil?
A heavy-bottomed cast iron Dutch oven or a thick stainless steel saucier is ideal. These vessels distribute heat evenly, preventing the beans at the bottom from scorching while the top ones remain undercooked.
When should I add the salt?
Contrary to old myths, salting the soaking water (brining) actually helps soften the skins. However, do not add the full amount of salt to the pot until the end, as the liquid will reduce and concentrate the saltiness.